Posture and positioning
How to avoid back-cleavage and a badly fitting wedding dress
INSPIRING INDIVIDUALITY
The way your wedding dress fits on your wedding day is not only up to the shop or dressmaker, You can influence the fit, simply armed with the right knowledge. This is about POSTURE and POSITIONING.
POSTURE
Just to be clear, this advice is purely based on the experience of a hard-working, 40-something mum, who spends a long time at a sewing machine and leaning over a pattern-cutting table, with no medical training whatsoever. Consult your Doctor or physiotherapist before taking any of these suggestions… I can take no responsibility if your posture improves from this amateur advice.
From when you first try wedding dresses on, through to having your first fitting, being fastened into your dress, and then dancing the night away in it, if you stand, sit and breathe correctly, you’ll notice a difference, and might just feel a whole lot better. This means practise:
Stand or sit straight, shoulders down and back, but not over-stretched, chin up, engage your pelvic muscles…yes that’s right…all of them. Without moving your shoulders.., take a deeeeeep breath, just using your belly if you can – push it out and in. You’ll feel your diaphragm muscle doing most of the work – keep your shoulders and upper chest as still as you can. Then try and continue with your normal breathing rhythm, maybe a bit slower and deeper if you can, but using the diaphragm as your main breathing muscle, letting the bottom of your lungs enjoy a bit of action.
If you’re able to stand, try with your feet slightly apart, rock forwards and backwards (preferably without toppling over), until you find the central position between the two: your hips are directly above your feet, knees soft, bum not sticking out, or hips slouched forwards.
If you are able, why not give it a go right now…and can you feel a difference…bit more relaxed and calm? Any medics reading this who want to chip in…would love you to comment!
POSITIONING
Here’s the nitty gritty on getting into your dress properly on the day.This bit is for whoever is dressing you on the morning of your wedding…
Most wedding dresses are fastened at the centre back and are generally snug – so there’s a bit of a knack in getting them done up, without creating the dreaded “back-cleavage”. Read on for 10 top tips to avoid it…
1.Once fastened, have your dresser run their fingers under the back of your bra strap to redistribute the skin at the centre, outwards, to avoid a centre back skin crease.
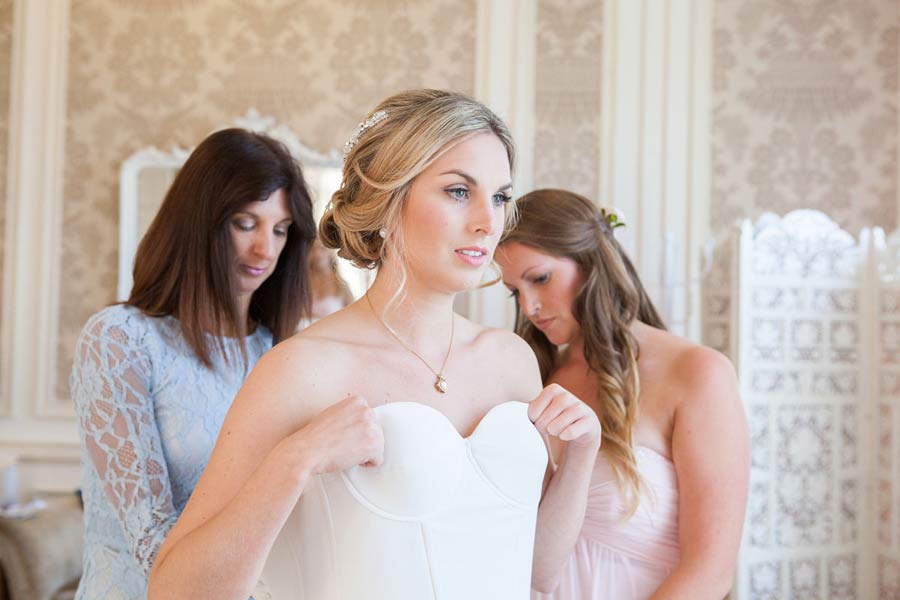
2.Step into your dress and stand in front of a mirror with CORRECT POSTURE, so your dresser can also see your front in the mirror.
3.You will need to hold the top centre front of your dress in the correct position: centrally on the body, not too high or low, otherwise it might not do up.
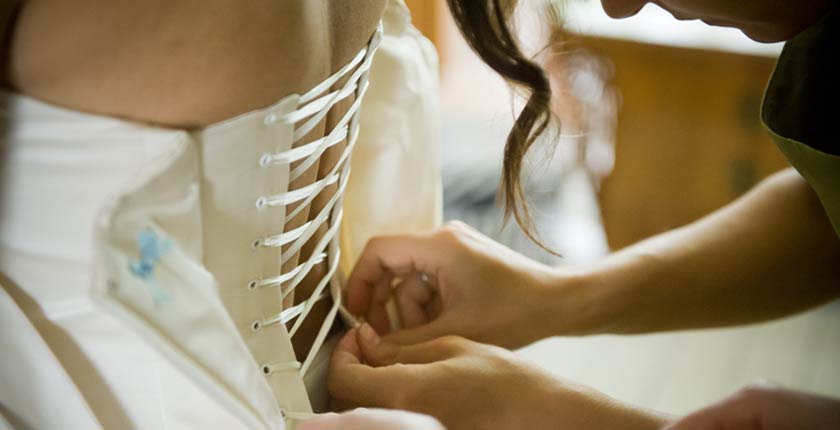
4. If there is an internal corset, or criss-cross ribbon fastening, then your dresser will need to start lacing loosely from the top. I’d love to say there is a glamorous designerish technique for this, but really it is just like lacing a pair of trainers. (Neatly). Once it’s all laced, they can go back to the top and keep working down and tightening gradually, while the body settles. During this, they need to keep on checking in the mirror that the front of the dress hasn’t slipped down or sideways.
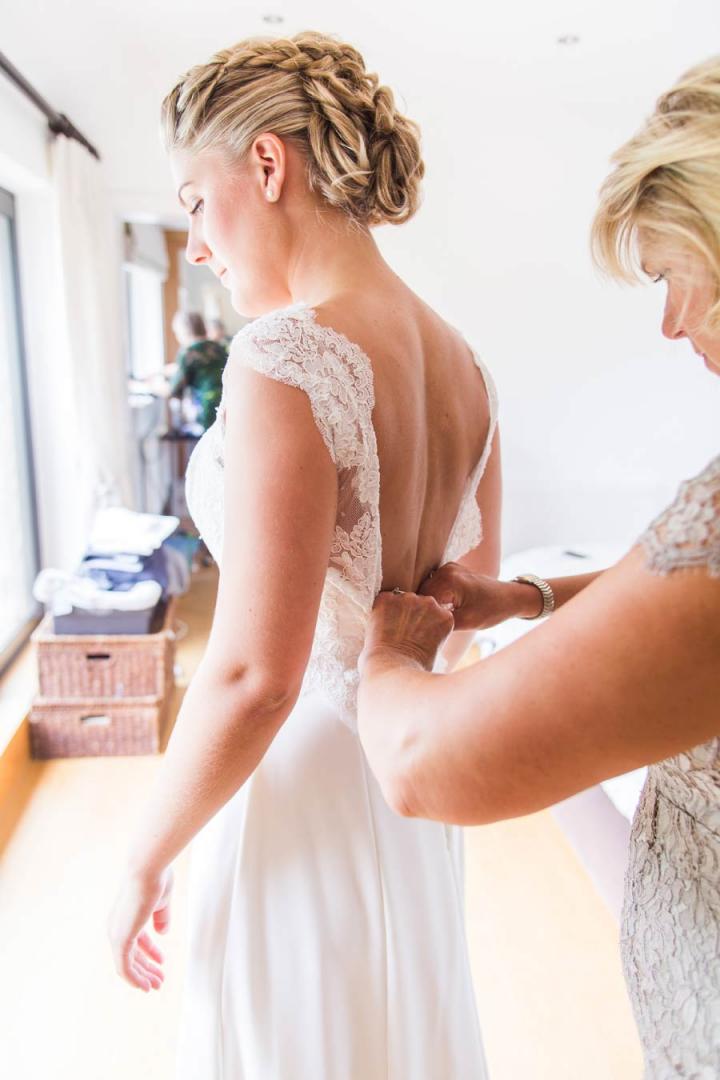
5. If there’s just a zip or buttons, with no internal corset, you can help by squeezing your hands on your waist, and pushing the fabric towards the back, to give your dresser room to fasten easily. If there are buttons, I find it easiest to fasten the top one, then the waist one, and then work up from the bottom.
6.Once fastened your dress will probably feel tight. Don’t worry if it doesn’t do up first go – it’s a bit like putting on a pair of skinny jeans when they’ve been washed…it takes a while for them to ease. Stay calm, have a pause, then tighten a little bit more after a few minutes. It may even help to move on to “Tip 7” below, before trying to do it up again, and then go back to complete the fastening after some repositioning….
7. The crucial last anti-back-cleavage part…Standing behind you, your dresser will need to place the palm of their left hand, thumb facing down, under your right armpit (we’re all friends aren’t we?!). Then, move the flesh forward as they pull the top edge of the dress gently outwards away from the body and back towards the centre back. Repeat on the opposite side, palm of their right hand under your left armpit, and reposition the body with the dress. Let me know if we need a video of this to explain!
8. Admire the slightly snugger effect this gives at the front…bit more cleavage?
9. Admire the lack of back cleavage and overhang
10. Pour the dresser a nice big glass of bubbly and off you go!
Beautiful photography by:
http://www.charlotterazzellphotography.com